
After four years of neglect I finally fertilized and separated my rhubarb plants. I have cared for these very minimally since we dug them up from someone’s abandoned lot. (We are classy.) With our mild spring I got a lot of gardening done despite having two toddling helpers. I now have rhubarb for days. Or Dayz because my rhubarb is that extreme.
No matter, I am able to deal with it because I have the perfect recipe for Rhubarb-Strawberry Jam. I clipped it out of the August 2009 issue of Saveur and have made it every year. You can find the recipe here but I will list the ingredients for you:
- 5 cups of Rhubarb cut into 1/2 to 3/4 inch pieces
- 2 cups of hulled and quartered strawberries
- 2 1/4 cups of sugar
- 1 tablespoon lemon juice
That’s it! I love this recipe because it is my Ideal Jam Recipe: tons of fruit, not much sugar, and no pectin/thickener to deal with. There is just enough sugar and strawberries to take the edge of the rhubarb but it’s still tart and bright. I learned the hard way that this recipe does not double, so learn from me and don’t end up with an enormous dutch oven of brown-black stringy goop that still won’t set up.
I measure the portions as follows–one heaping 2-cup Pyrex cup of strawberries and two of rhubarb.


It’s pretty scientific. I can attest it works though, the pure laziness and forgiveness of this jam is another reason I love it. I can make this jam while my kids scream at my feet for whatevertheheck and it turns out beautifully. Because this jam does not double, I prep several batches when I come home with my 1/2 flat of strawberries. Hilariously, I buy my strawberries from down south so it’s not really a pure Alaskan Jam. I do grow strawberries in my yard but it’s a race between my kids and the slugs to see who can eat more.
Anyway, make sure you use an even mix of the red and green rhubarb stalks. Before I paid attention to that, my jam was a tasty brown pile. It’s a fun complimentary colors fact! Red + Green = brown glop in a Kerr jar. Don’t worry about it too much but if you want your jam to be a pretty pink pile of goop, minimize the green.
So then you dump all the ingredients into a pot, bring it to a boil then reduce heat. You should stir it often and skim the foam off. I never used to skim but it makes the texture so much nicer in the final product. It takes about one to one and a half hours to cook down.


Then you can it! I use a random assortment of jars with the standard rings and seals. I give a lot of this jam away so I’m not to stressed about having fancy jars. (I would love to have a pinterest pantry full of Weck jars but that’s not my life.)
I follow whatever USDA guidelines exist for canning. I use a hot pack in sterile jars then process in a hot water bath for 10 minutes. I have a big canner with one of those racks that hold 7 jars.
Done
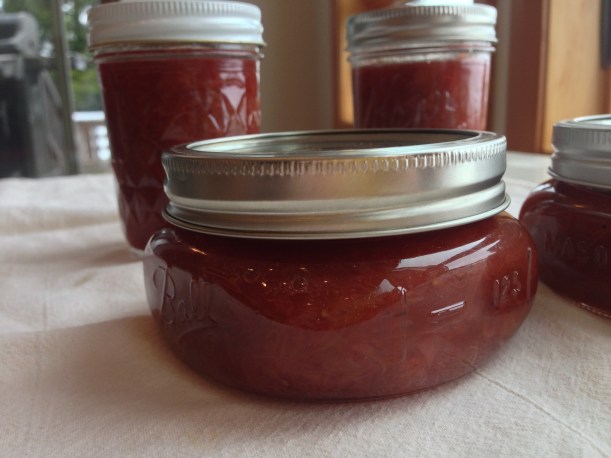
And there is a pretty jar of jam. Also, those squat jars are super-pretty but suck to process in a canner. They are the width of a quart jar but are shorter than the sides of the racks so they slide all over the frickin’ planet. I have two left to give away then I’m never buying them again. I am a solid wide-mouth pint or half-pint person. Yes that is boring but they stack nicely. Those up in that picture do not stack and that frustrates me.
When I was a kid, I never thought I would have strong opinions on canning jars. I’m not going to die on a hill over them or anything but I would probably argue with a stranger at a bar if I’ve had a few. There you go. Make some jam.

